Linux: PrivateInternetAccess Using OpenVPN and Squid Proxy – Part 2

PrivateInternetAccess Using OpenVPN and Squid Proxy – Software Installation

In this article we are going to run through the Debian, OpenVPN and Squid proxy software installation. In this tutorial we are installing it on a virtual machine in an ESXi environment but it can obviously be installed on any PC, virtual or otherwise. We are using a dual-core CPU with 2GB of RAM which is more than enough for a light-user proxy.

Let’s get started!

1. Download the netinstall iso, burn it to CD/DVD if necessary and boot. Run through the install and make sure to specify your static IP. You only need a minimal installation, no desktop manager so select the options as shown:

OpenVPN and Squid Proxy - Software Installation

2. Once installed and logged in, update the apt repositories with apt-get update:
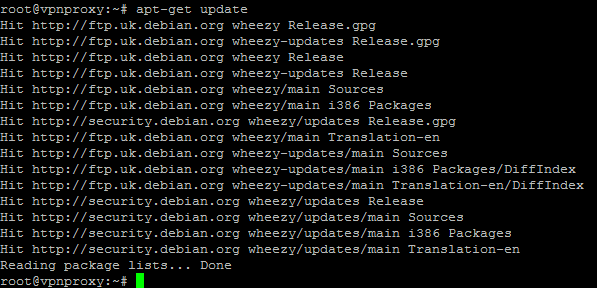
OpenVPN and Squid Proxy - Software Installation

3. Install the Webmin software

  • Install the required dependencies:
  • apt-get install perl libnet-ssleay-perl openssl libauthen-pam-perl libpam-runtime libio-pty-perl apt-show-versions python
  • Answer “y” when prompted to download and debian will do the rest.
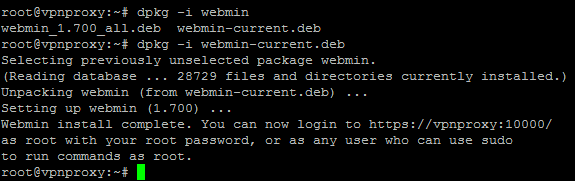
  • Download the webmin package and instal with dpkg:
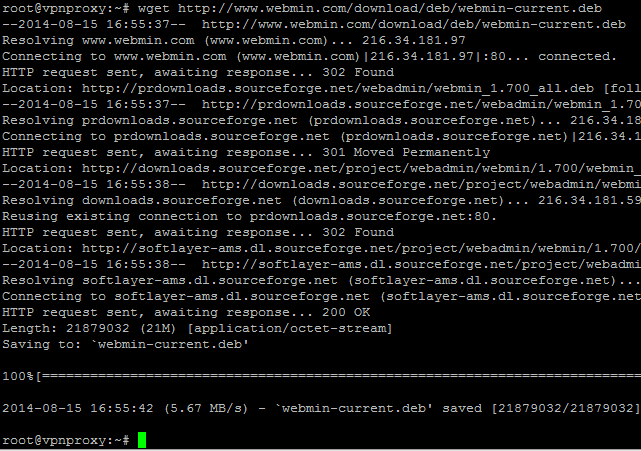
  • OpenVPN and Squid Proxy - Software Installation
  • dpkg -i webmin-current.deb:
  • OpenVPN and Squid Proxy - Software Installation

4. Install the OpenVPN software:

  • apt-get install openvpn

5. Install squid proxy software:

  • apt-get install squid

Now we’re all installed, it’s time for the configuration.
Linux: PrivateInternetAccess Using OpenVPN and Squid Proxy – Part 1

PrivateInternetAccess Using OpenVPN and Squid Proxy – Introduction

This series of articles describes how to set up a VPN connection to PrivateInternetAccess using OpenVPN and squid proxy to share the VPN connection and overcome the 5 device limit on the PIA account.

We will be using:

  • Debian Wheezy netinstall ISO
    • webmin – to configure our server
    • OpenVPN – to create our VPN connection
    • squid proxy – to route specific traffic or applications through the VPN

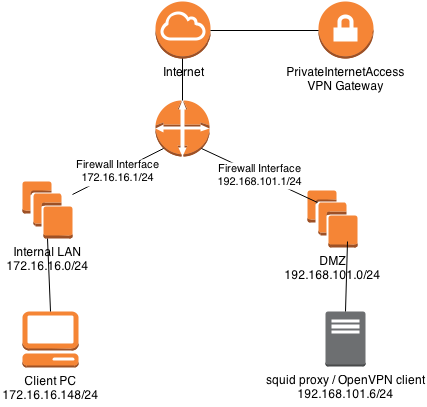
Our network diagram for this example is as follows:

PrivateInternetAccess Using OpenVPN And Squid Proxy

The client is sitting on the 172.16.16.0 network and accessing the proxy in the DMZ 192.168.101.0 subnet. Outgoing traffic will then be routed out through the VPN interface (tun0) encrypted and anonymised.

This series is organised as follows:

  1.  Installing Debian using the netinstall method and making sure we have the correct software installed
  2. Configuring squid proxy
  3. Installing and configuring OpenVPN to connect to the PrivateInternetAccess VPN
  4.  Final words

Enjoy and comments welcome!


WordPress: Unable To Create Directory Error

This article describes how to securely fix the wordpress “Unable To Create Directory Error”

This is a general permissions error and may be uncovered in a variety of situations; the most common of these is when trying to upload images:

“Unable to create directory /wp-content/uploads//. Is its parent directory writable by the server?”

There are many various articles about this error and horrifically, a lot of them advise fixes which are glaring security holes and can / will lead to compromise of the web server.

They look something like this: “Change permission of directories to 757 or 777” – doing this allows anyone on the internet to upload write files to your directory!!!

Here is the secure solution:

  1. Check to see which user & group the apache web server runs under. This information is held in the /etc/apache2/envvars file and you can view it as follows:

    Wordpress: Unable To Create Directory Error Fix
    Apache RUN Vars
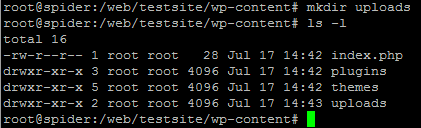
  2. Create the directory in question if necessary – note: it may already exist:

    Wordpress Unable to Create Directory Error
    Create uploads Directory
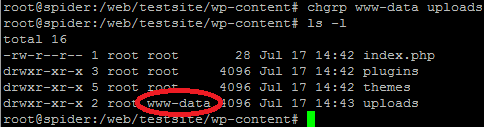
  3. Change the group ownership of the directory to the group apache runs under – in this case  you can see that the group is “www-data”:

    Wordpress Unable to Create Directory Error
    Change group permissions
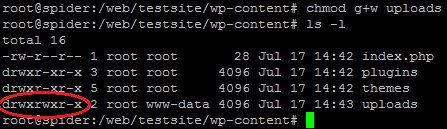
  4. Assign write permission to the group for that directory:

    Wordpress Unable To Create Directory Error
    Change Group Permissions

Job done!