Quick Reference: apt-get

apt-get is the command-line tool for handling packages for Debian Linux which is use to:

  • Install/manage individual packages
  • Upgrade packages
  • Apply security patch(s)
  • Keep Debian system up to date
  • Download source .deb files
  • Has many GUI and other utilities as front-ends

Here is quick cheat sheet you will find handy while using apt-get at shell prompt:

Syntax Description Example(s)
apt-get install {package} Install the new package. If package is installed then try to upgrade to latest version apt-get install zip
apt-get install lsof samba mysql-client
apt-get install {package} -f Install the new package and fix any broken dependencies. “-f” equates to “–fix-broken” apt-get install -f zip
apt-get install -f lsof samba mysql-client
apt-get remove {package} Remove/Delete an installed package except configuration files apt-get remove zip
apt-get –purge remove {package} Remove/Delete everything including configuration files apt-get –purge remove mysql-server
apt-get update
apt-get upgrade
Resynchronize the package index files and Upgrade the Debian Linux system including security update (Internet access required) apt-get update
apt-get upgrade
apt-get update
apt-get dist-upgrade
Usually use to upgrade to Debian distribution. For example Woody to Sarge upgrade. ‘dist-upgrade’ in addition to performing the function of upgrade, also intelligently handles changing dependencies with new versions of packages; apt-get has a “smart” conflict resolution system, and it will attempt to upgrade the most important packages at the expense of less important ones if necessary. apt-get update
apt-get dist-upgrade

{package} – Replace with actual package name

The full man page for apt-get can be found here: http://ss64.com/bash/apt-get.html

Cannot Contact the Specified Host Error

Workaround for the Cannot contact the specified host” error

This article describes how to work around the “Cannot contact the specified host” error when connecting an ESXi host to a vCenter after upgrading it to 5.5 U3b.

” Cannot contact the specified host. The host may not be available on the network, a network configuration problem may exist, or the management service on this host is not responding “

This error comes about due to SSLv3 and its associated POODLE vulnerability being disabled in the latest update – 5.5 U3b. The vCenter tries to talk SSL v3 to the host which is dropped straight away with a FIN return packet from the host.

The ideal solution is to upgrade your vCenter to 5.5 U3b. Should this not be an option for whatever reason, you can enable SSL v3 on your ESXi host – be aware of the security implications though!

There are two parts where you need to enable SSLv3:

1. Enabling SSLv3 for Hostd – Port 443

1. Open a SSH to this ESXi host.
2. Browse to this location using the below command:

# cd /etc/vmware/rhttpproxy

3. Backup the config file:

# cp config.xml config.xml.bak

4. Edit the file using the below command (Press i to begin edit)

# vi config.xml

Locate the <vmacore>, then locate the <ssl> Under <ssl> add the following entry:

<sslOptions>16924672</sslOptions>

5.Save the file by pressing Esc and then typing :wq!

2. Enabling SSLv3 for Port 902 (Required to connect to vCenter)

1. From the same SSH of the host, run the below command:

# esxcli system settings advanced set -o /UserVars/VMAuthdDisabledProtocols -s ""

Restart the rhhtpproxy using the below command:

# /etc/init.d/rhttpproxy restart
That’s it, now you can connect this ESXi 5.5 U3b host to a lower version of vCenter. To reiterate: this is not a recommended practice as it will expose the host to the SSLv3 POODLE vulnerability.

Build A Complete Linux Media Server – Install Sonarr Series Download Manager

Install Sonarr Downloader

This article describes how to install Sonarr on Debian and integrate it with the previously configured transmission and nzbget programs.

Sonarr is the new name for NZBdrone – an application which not only automates TV show downloads but also maintains them after this is done. For example, depending on settings you configure, Sonarr will download an episode of a series in SD format as soon as it is posted and then upgrade it as progressively better quality releases become available.

Install Mono

Mono is an open source impementation of Microsoft’s .NET runtime and required in order run Sonarr. Debian needs a couple of extra steps to install this:

  1. Add the mono repositories to the Debian sources list:
    • sudo apt-key adv --keyserver hkp://keyserver.ubuntu.com:80 --recv-keys 3FA7E0328081BFF6A14DA29AA6A19B38D3D831EF
      echo "deb http://download.mono-project.com/repo/debian wheezy main" | sudo tee /etc/apt/sources.list.d/mono-xamarin.list
      echo "deb http://download.mono-project.com/repo/debian wheezy-libjpeg62-compat main" | sudo tee -a /etc/apt/sources.list.d/mono-xamarin.list
  2. Update the package lists and install:
    • sudo apt-get upgrade && sudo apt-get install mono-devel

 Install Sonarr

First, add the Sonarr software repository to the debian software source list. This will allow us to easily install (and upgrade in the future) using apt-get:

sudo apt-key adv --keyserver keyserver.ubuntu.com --recv-keys FDA5DFFC
echo "deb http://apt.sonarr.tv/ master main" | sudo tee /etc/apt/sources.list.d/sonarr.list

The next step is to install Sonarr itself:

sudo apt-get update
sudo apt-get install nzbdrone

Configure Sonarr to Run As a Service Under nobody:nogroup

  1. Change permissions on the Sonarr folder:
    • sudo chown -R nobody:nogroup /opt/NzbDrone/
  2. Create the file sonarr.service in /etc/systemd/system/ and paste in the following:
    • [Unit]
      Description=Sonarr Daemon
      After=network.target
      
      [Service]
      User=nobody
      Group=nogroup
      Restart=always
      RestartSec=5
      Type=simple
      ExecStart=/usr/bin/mono /opt/NzbDrone/NzbDrone.exe -nobrowser -data=ExecStart=/usr/bin/mono /opt/NzbDrone/NzbDrone.exe -nobrowser -data=/home/nobody/.config/NzbDrone
      TimeoutStopSec=20
      KillMode=process
      Restart=on-failure
      
      [Install]
      WantedBy=multi-user.target
  3. Update systemctl, enable the service and start sonarr:
    • sudo systemctl daemon-reload 
      sudo systemctl enable sonarr 
      sudo systemctl start sonarr
  4. This point is just a reminder that if you haven’t given nobody a home as detailed on the server install page then you’ll need to do it now and then restart sonarr. This is necessary to enable sonarr to auto-update which it can only do if the config files are kept separately away from its install directory.

Connect to Sonarr Web GUI

Open your browser and browse to http://your_server_ip:8989/

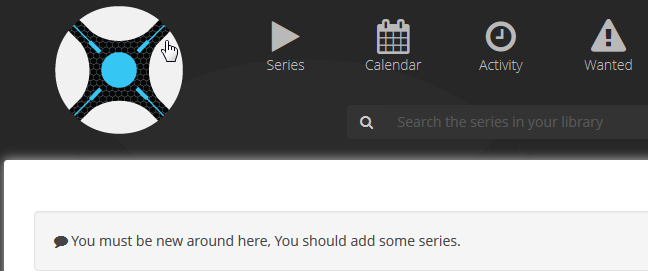
You should now see the following and this tells us that everything is working well:

sonarr web gui

Now we can proceed to our Sonarr configuration – click here to continue!